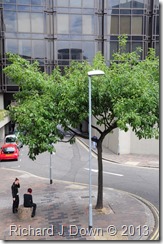
Wednesday 20 November 2013

Assignment three – Monochrome


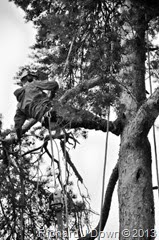
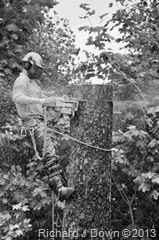
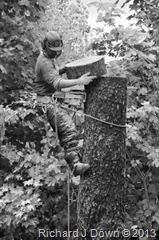
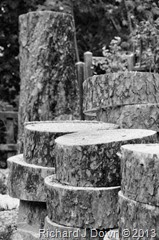
For this assignment, I have chosen a narrative theme which documents the removal of a Scots Pine tree from my garden. Its proximity to the house and the increasing severity of winter storms meant that I had to have it removed. Fortunately, my fears were justified as the base of the trunk had started to rot. The tree surgeon told me that in three years it would have become dangerously unstable.
 
I was recording the event in any case, on video as well as in still photographs but it wasn’t until the weather changed on the second day that I thought that it would make a good monochrome subject, with the poor lighting draining the colour out of the scene. The textures of the foliage, bark, sawn wood and sawdust also lend themselves to monochrome treatment.
 
 
The photographs were taken over three days, the first in bright autumn sunshine the remaining two days were wet and overcast.
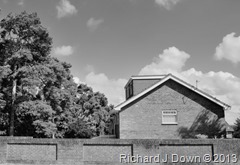
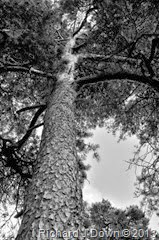
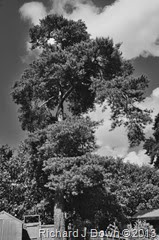
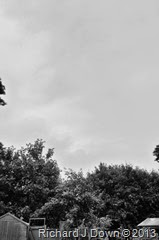
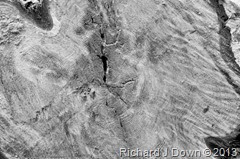
The nine prints that I have made should be viewed in chronological order and as a start I have laid out this “contact” sheet as a guide. I have asked my tutor to look at this post as the course notes suggest 5-10 prints. Sharon has already seen a tentative idea of the assignment at the Study Group on 19th October 2013.

The prints are read from the top and left to right:


DSC_3958_first_edit_print_copy_web
Print 1 (3958)
 
DSC_3949_1_print_copy_web
Print 2 (3949)
DSC_3954_print_copy_web
Print3 (3954)
DSC_3965_1_print_copy_web
Print 3 (3965)
DSC_3969_print_copy_web
Print 5 (3969)
DSC_3970_print_copy_web
Print 6 (3970)
DSC_3977_print_copy_web
Print 7 (3977)
DSC_3979_print_copy_web
Print 8 (3979)
DSC_3982_print_copy_web
Print 9 (3982)
My idea is to submit all of these prints as a set. Depending on tutor feedback, there may be less. At the study group last month, I got some good feedback and as a result I changed the way I processed the images in Silver FX Pro2, choosing to adjust only the brightness and contrast, highlight and shadow protection and perhaps apply a colour filter in some cases.
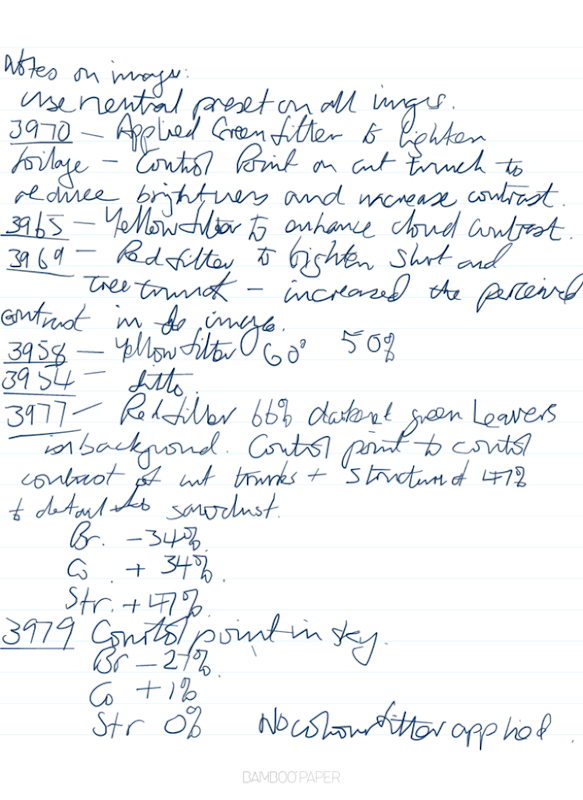
Making these adjustments in the plug-in using Capture NX2 unfortunately does not include the non-destructive element of NX2 itself so it is not possible to review the changes I made to every print, though I did record the following as I was working to give some idea:
Page 3
You can see that I have used various adjustments including control points to modify the brighter parts of the images and various colour filters to change the tones. These are all subjective adjustments, sometimes very subtle and difficult to record on a monitor. For this reason, my next section is about using the proofing tool to match screen output with printed output.
Until now I have used a lab for printing the majority of my assignments but I was disappointed with the results of the first attempt so I have printed the assignment myself. I only have a four colour printer (CMYK) so the range of grey tones may be limited but I think I have done a better job than the lab in this case and a least I can immediately see the results and reprint if necessary. In the past I have been disappointed with inkjet printing but now the technology seems to be improving and I may well invest in a more sophisticated printer as I reach the second level of my degree course.
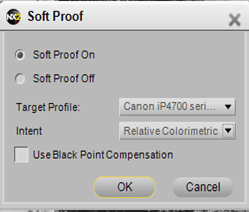
Capture NX2 has a soft proofing system and I have practised using this for the assignment prints. My basic workflow is this:
  1. Open the .tiff image from the Silver FX2 Pro2 conversion
  2. Duplicate the file and save it as a NEF file (this will record all edits and allow new versions to be made) Add the suffix _print_copy to the file name for reference
  3. Have the two files open in the workspace side by side.
  4. On the print copy, open the soft proof dialogue an apply these settings for paper profile and intent:
 
image
 
5. With Soft Proof on make adjustments to match the print copy as closely as possible
6. Save and print the print copy, checking the colour management dialogue in the print window.
 
image
 
This has resulted in prints closely matching the image on my monitor although I have noticed subtle differences in the print colour depending on the light in which it is viewed and a more noticeable change in the ink colour as the print dries.
Having looked again at the nine prints I have decided to include them all in my submission except for 3954 as 3949 fulfils the same role showing the tree standing in situ. I have renumbered the prints and submitted them to my tutor with a viewing layout sheet:
image

Reflection on Assignment 3
Demonstration of technical and visual skills: I have shown from this assignment that I can apply the skills I learned from the exercises to produce monochrome images from my digital files and shown skill in their conversion and enhancement to produce interesting images.
Quality of outcomes: I have used my knowledge and experience to conceive this idea and present it in an understandable way. 
Demonstration of creativity: This is a personal project. I have recorded what has happened to a very old tree.  I have lived with it in my garden for 27 years and I wanted to mark its passing.
Context: Earlier in the course I wrote about Ansel Adam’s book “Trees”. I remarked then that I was fortunate to live in an area where I was surrounded by trees. They are a renewable resource but I am aware that they need to be looked after. A living thing that has survived for over 100 years deserves some respect. The woodland of which this tree once formed a part, can be seen in this historic photograph:
Photo of Bordon, 1919 - Francis Frith  (my house was built beyond the trees on the left of this picture)
This assignment has been submitted to my tutor as a set of prints on 20/11/13

Tutor feedback on Assignment 3 (24th November 2013)

I was pleased to receive detailed and comprehensive feedback from my tutor. She was positive about the way I had presented it and thought that the images worked well together in black and white. I will re-write the introduction  to the project to make more of the idea of this collection of images as a memoriam to a tree. I was unsure just how much to write as I wanted the images to stand on their own. I will re-edit the group in response to tutor feedback.  Here is an extract of my tutor’s feedback with the issues that I will be addressing in preparation for assessment:

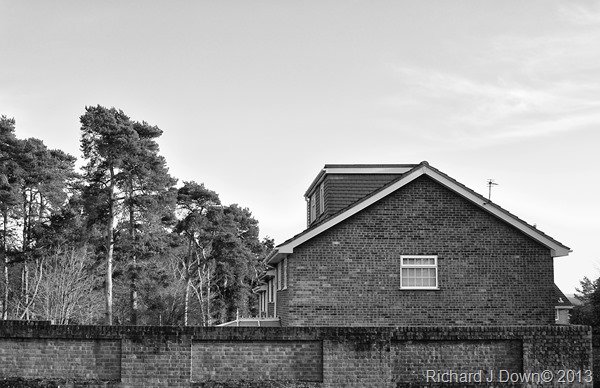
The last picture is great – it’s like the fingerprint of the tree. I almost see that one as sitting slightly aside form the other more chronological set. It could be the picture on the coffin at the funeral! I really liked how you talked about this as ‘ode to a tree’ and TV and the idea of an obituary for the tree really stayed with me. I hoped you would have made more of this, more in it’s contextualization and written introduction. It could have really pushed some creative buttons! (The way you introduced it at OCATV has really stayed with me and for me is the strength of the idea – something you should make more of in your write up / introduction for assessment.) That aside I still think this works as a successful and coherent set of images around an interesting subject matter. I particularly like the first image of the house and the looming tree – somehow the context is very absurd and sets the tone well for the rest of the pictures, which could as easily be set in a forest.

You did well on the edit. There is just enough and not too much information to take us through the journey. Perhaps, arguably you didn’t need both 4 and 5, but that is minor.

Perhaps you could revisit the same picture as the opening image now without the tree and create a bookend effect instead of the empty sky? Just an idea. The empty sky is a nice representation of the clearing though and you may not want to be so obvious – however something within me would like to see and compare the house before and after!


As suggested I will try to write up my book reviews as I go along and make them more detailed.


Editing in preparation for Assessment: I have added more to the introduction as suggested by my tutor and introduced more in the context of my family associations with this area. I have also edited the submission and taken new photographs in response to Sharon’s feedback.

I wanted to mark the passing of this tree with a set of photographs. It seems almost callous to destroy such a large living thing without any record or memorial.  It has stood for about 126 years and survived the 1987 storm when hundreds of trees in the immediate area were devastated. A rare feat of survival for a 100 year old. (I researched Dendrochronology and discovered that counting tree rings is not a particularly accurate way of aging a tree but for these purposes I think it is accurate enough)

Sharon’s remark about the “fingerprint of the tree” and “the photograph on the coffin” got me thinking. The tree surgeon had cut me a thin slice across the trunk very close to the bottom so I counted the tree rings and thought about the significant dates in my family’s  history which were relevant to the tree and where it was (Bordon in Hampshire).

Between 1887 (my estimate of when the tree started growing) and 2013 I could link these events to the tree’s timeline:

1903 – After the Boer War, my Grandfather was posted to nearby Longmoor Ranges with the Royal Engineers where they were building a railway. My Aunt was also born in this year at Whitehill, within a mile of the tree and where my son and his now family live.

1919 – Within a hundred yards, this photograph was taken: Photo of Bordon, 1919 - Francis Frith

1936 - (or thereabouts) My father, newly enlisted into the Grenadier Guards, attended a training Camp at Oxney Farm which is still an Army training area and just a 1.5 mile walk to the northwest.

1986 – The year I moved to Bordon, bought this house and learned about my family connections to the area.

I have made several  changes to the print submissions in response to feedback, removing print 5 and substituting this new print of the house without the tree (taken in December) for Print 7, below.


DSC_4779_crop


Here is the final layout for Assessment submission:

image

Tuesday 3 September 2013

Assignment 2 – Seeing like your camera–concluded


Print Submission. I will submit the following 15 prints to my tutor for the categories listed.
Part 1:
Strong incident dappled light

DSC_3074_web DSC_3088_web DSC_3091_web

Street scene in the middle of a clear sunny day

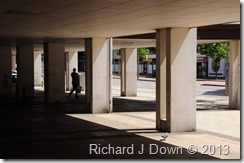
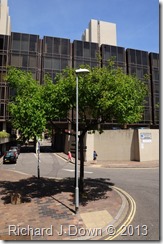
DSC_3104_webDSC_3168_web DSC_3129_web  

Landscape with low angle incident light

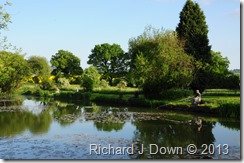
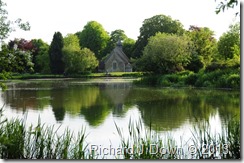
DSC_3176_webDSC_3179_web DSC_3209_web  

Indoor space with strong natural window light

DSC_3819_webDSC_3735_web DSC_3795_web  

Part 2
Street scene re–photographed

DSC_3896_webDSC_3922_web DSC_3903_web  


Reflection on Assignment 2

This was a challenging assignment, not just because of the broad range of situations in which I had to make photographs, the frustration of waiting for the weather to change but also attempting to introduce some creativity into what seemed a technical exercise about pre-visualising what you would get from your camera given the lighting conditions in front of you.
Looking at the  four Assessment Criteria I think I have demonstrated technical and visual skills, I am happy with the quality of my outcomes, context and reflection  but I haven’t really demonstrated much, creativity or originality. It was something I was aware of as I took my photographs but the technical requirements kept getting in the way. Must try harder!
My tutors advice for this assignment was to devise a series on a theme and to be honest I just couldn’t think of something that I could fit into all of  the lighting scenarios required. Perhaps I should use people more? Something I find difficult but must try to overcome.

Wider research,  reading and projects

Developing my own style or “voice” may take a long time but I have joined the Thames Valley Study Group and attended my first meeting. I will continue to get to as many study visits as I can. I have started to re-read “The Photograph as Contemporary Art” (I struggle with the language used in some of these books, so much for Art being accessible!)
I have started Geoff Dyers “The On-going Moment” and I need to review Susan Bright’s “Art Photography Now” having read that some months ago.
During the visit to the Prix Pictet exhibition, I discussed with my tutor a possible future project at one of  the Army Training Units near my home. Unfortunately my early retirement from the MOD means that I no longer have access to the personnel or facilities but I am continuing with my candid street photography project.

Tutor Feedback on Assignment 2

I received positive and constructive feedback from my tutor for this assignment, mainly about the brief which I was aware of. I will take the advice offered and use the brief as a starting point and develop a theme and work it into the assignment. Hopefully this will make the assignments less of a slog (I did find this one frustrating and found it difficult to motivate myself towards the end)  I have read ahead to the next assignment and I already have one or two ideas and some photographs that I can work with. I will also add a separate section for assignments to my learning log.

Assignment 2 – Seeing like your camera


Saturday, 27 July 2013

 
Part 1
The task for this assignment is to use high contrast scenes and pre-visualise how the digital camera will record them with the ultimate objective of producing images that need no further processing.
From the list in the brief, I chose the following:
  • Scenes with strong incident dappled light
  • Street scene in the middle of a clear sunny day
  • Late evening/early morning landscape with low angle incident light
  • Indoor space lit by strong, natural window light.
Below, I have detailed the process of making the images and the challenges involved for each situation. My camera was set on manual and the image quality is set on JPEG fine. Although I knew that the high contrast situations would mean compromises, either with blocked shadows or clipped highlights, I experimented with different compositions and exposures. I used the clipped highlight warning shown on the camera’s viewing screen as a guide while shooting.
Strong incident dappled light
These images were made on Durford Heath in Hampshire. I had previously visited the site and had a good idea of what I wanted to photograph.
I used a tripod for this exercise so that I could shoot at low shutter speed (1/15 sec) and smaller apertures. First of all, I established the range of exposure values. The darkest shadows needed f8, the sunlit leaves, f22 and the sky, f32 (this value for the wide end of my zoom lens) The procedure below was followed for all three images selected.
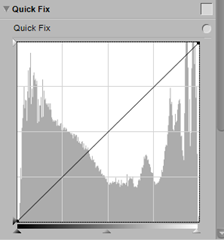
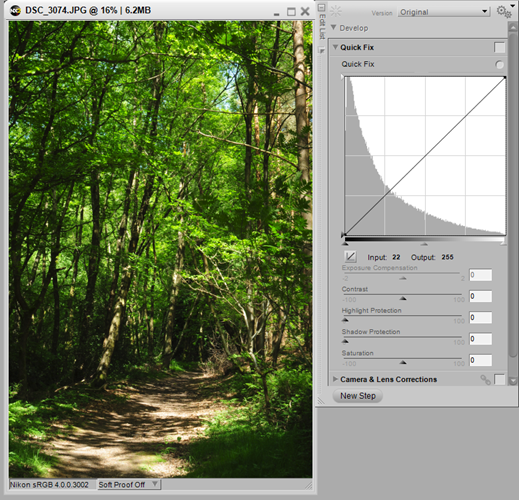
1. I chose my first scene and bracketed from f11 to f25 keeping an eye on the highlight clipping warning. The images are shown below with their histograms:

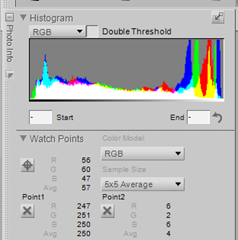
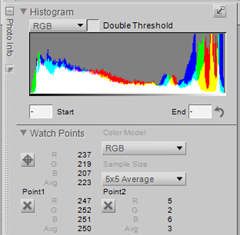
1/15s f16  There was no highlight warning for this exposure. The watch points showed a pixel value of 255 for  the one highlight in the centre foreground and 9 for the darkest shadows.
image


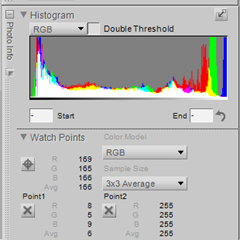
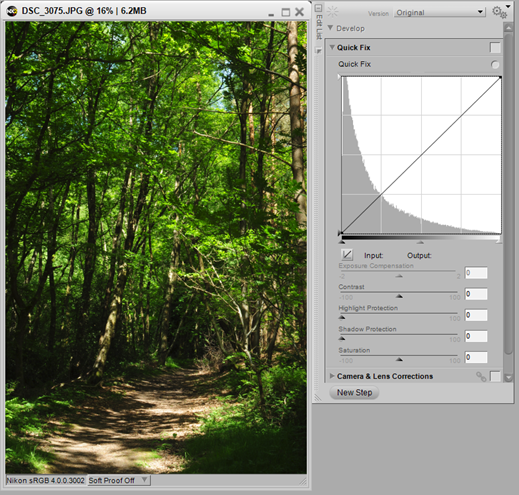
1/15s f18 There was no highlight warning for this exposure. The watch point for the shadows was 2 at the darkest point

. image

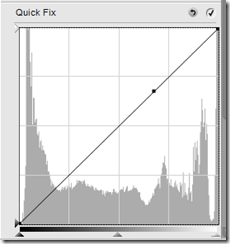
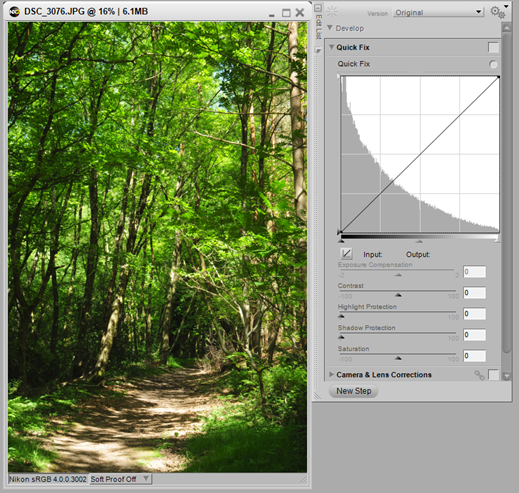
1/15s f14 There was more highlight clipping on this image and an average value of 6 for the darkest shadow area.
image


Of the three, I will choose 3074 as the most acceptable. At full magnification the highlight areas are acceptable. I chose this viewpoint of the path with the sun over my right shoulder to avoid lens flare and sun in the frame.
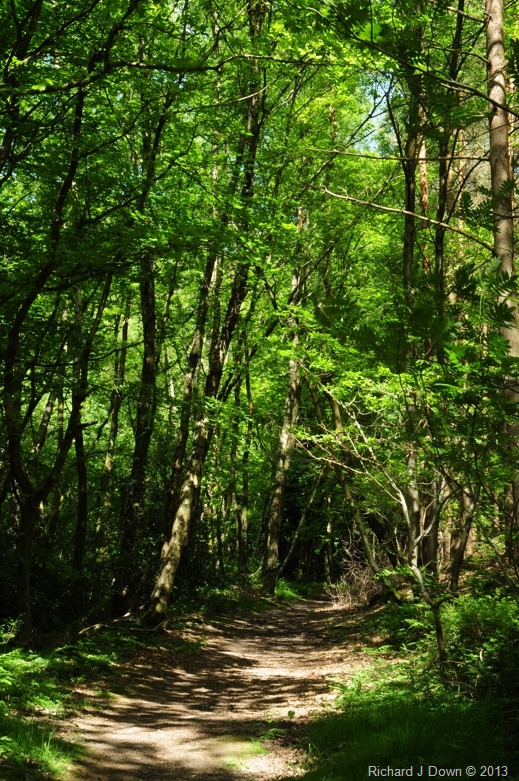
DSC_3074_web

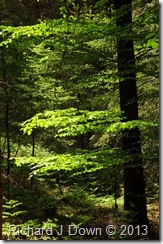
2. For my second scene I wanted to show the radiance of the fresh green in the new leaves  I paid more attention to the composition, leaving out the sky and avoiding having the sun directly in the frame. I think this is an acceptable compromise. I bracketed the exposure over the following range; f13, f16 & f20.

1/15s f20

image image
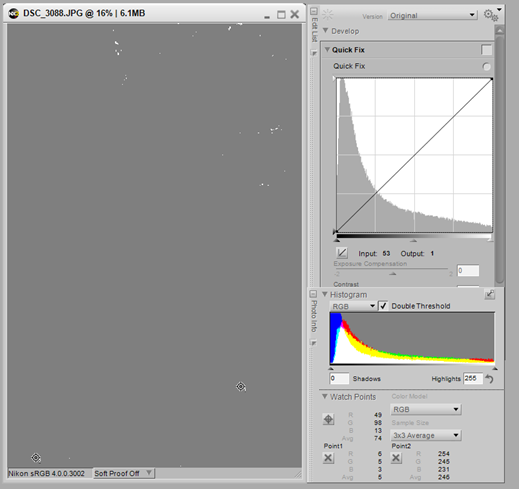
The double threshold tool displays the areas where the highlights are clipped and the shadows are blocked.
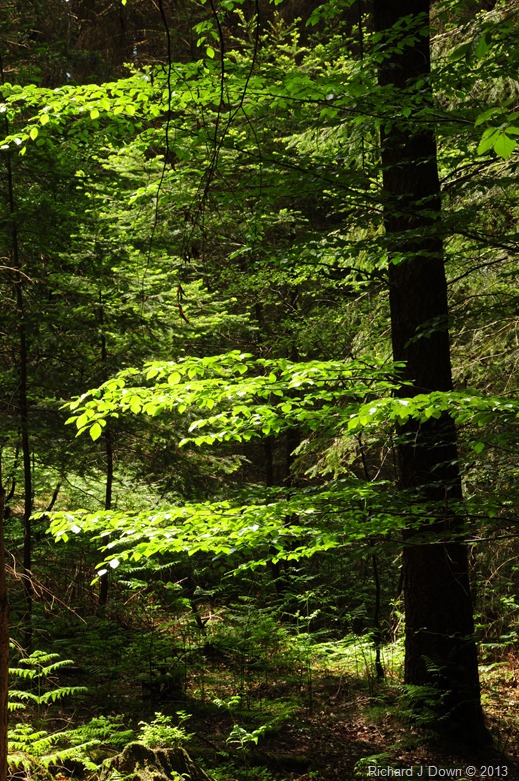
DSC_3091_web


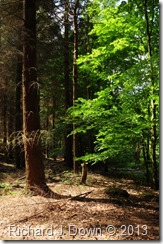
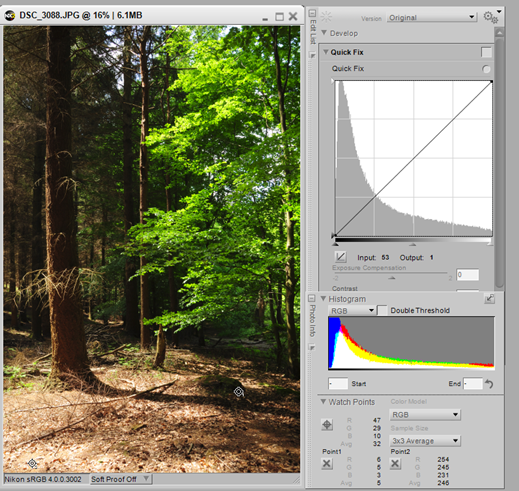
3. For my third scene I wanted to contrast the bright green new growth of the broad leafed trees with the apparently dry brown conifers planted alongside. The exposure for this image was 1/15s f11. I shot at f11, f14 and f18.
image

The double threshold tool shows just a few clipped highlights and no blocked shadows. I have included two watch points on this screen shot. 1, in the shadow area has an average RGB pixel value of 5 and 2, in the highlight area in the foreground has a value of 246.
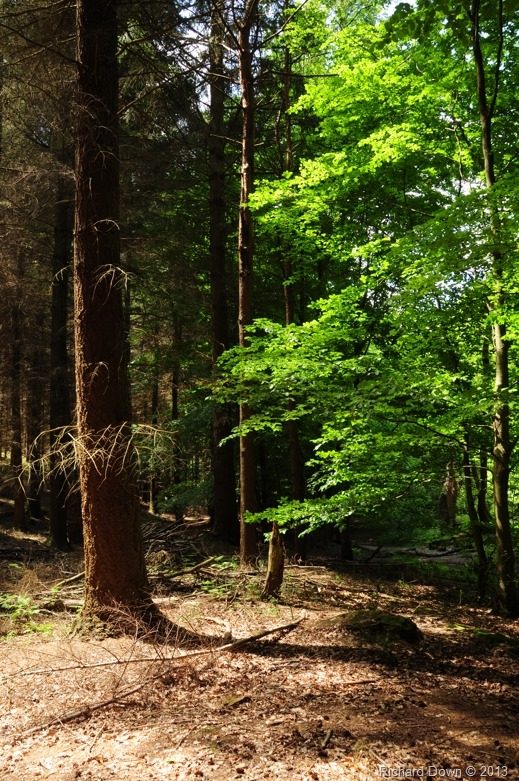
image
DSC_3088_web


Street scene in the middle of a clear sunny day
The pictures were taken in Portsmouth where there are not a lot of tall buildings or narrow streets but it’s a close as I could get. My technique for judging these images were similar to those above, i.e. bracketing and using the highlight clipping display on the camera.
1. For this first example, I used a scene where half of the street was in shadow. I spot metered the neutral tone of the sunlight tower block – 1/125 f18 and the red brick building in shadow –1/125 f5.6. I then made three exposures at various focal lengths with the metering system set on matrix to see which scene gave an image where the highlight clipping warning wasn’t activated.
(a) 3102 1/125 f16  18mm – no highlight clipping warning
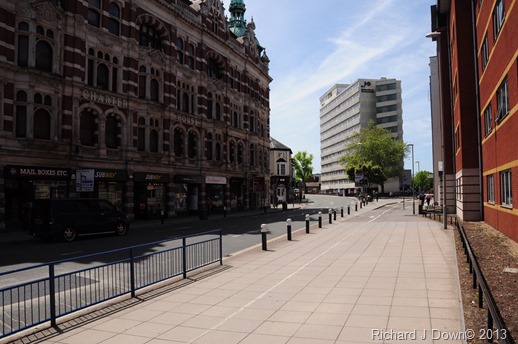
DSC_3102
Watch points indicate that neither shadows or highlights are clipped:
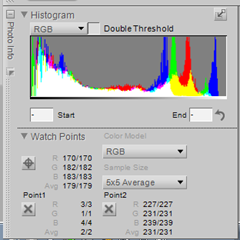
image image
However the contrast is still very high with a large portion of the image in shadow.


(b) 3103 1/125 f13 26mm - with 2/3 of a stop more exposure, I zoomed in slightly, the highlight clipping warning on my camera indicated that the cloud across the top of the frame is clipped. However, from the watch points and the histogram it can be seen that these extreme points have values of 250 and 4 indicating that this is an acceptable compromise.
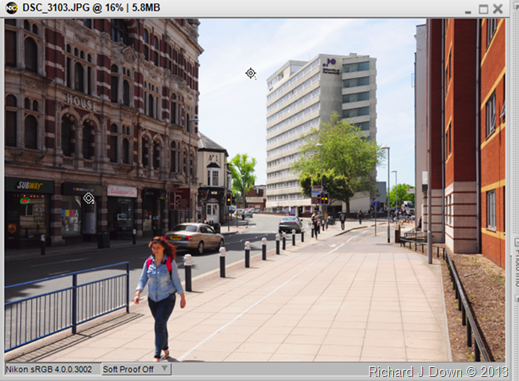
image
imageimage


(c) 3104 1/125 f13 29mm – I recomposed this image and used the same exposure setting. The highlight
warning still showed on the camera but again the watch point and double threshold display only indicate very small highlights from the car bodywork.
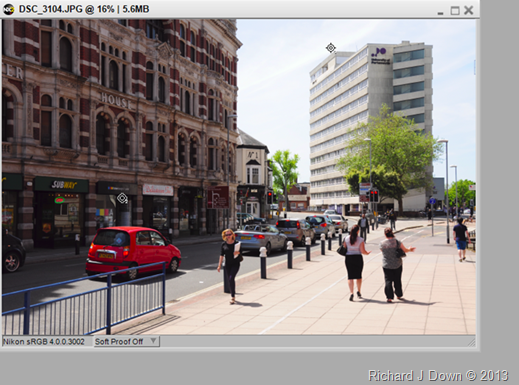
image
imageimage
*I will submit this image as one of the three for this category.


3108 1/125 f10 Rather than bracket this shot, I spot metered the sky (f29) and the shadow under the trees (f5.6) to establish the range. I then switched to Matrix metering and decided that this value (f10) would produce an acceptable image. The watch points confirm that there are no blocked shadows and the only clipped highlight is the white shirt of the man in the middle ground.
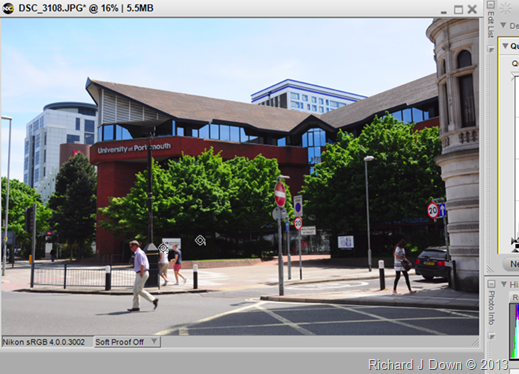
image
imageimage


3112 1/125 f10 I chose the same method for this shot of the veranda of  the Theatre Royal. I spot metered the dark marble in the shadows (f4.8) and the lighter but shadowed areas of the building on the other side of  the road (f8) but I realised that the area of sky at top left would burn out so I set the matrix metering option which gave a reading of f10. I have included the histogram and two watch points in this screenshot which show an average of  6 and 254 for the shadows and highlights respectively.
image


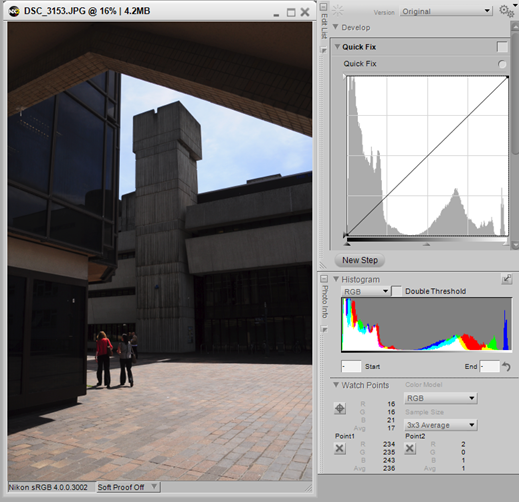
3153 1/100s f16 I used a different approach for this image. Using the matrix setting for the meter, the exposure reading  was as shown, rendering the sky its natural blue colour but the rest of the frame is underexposed. Histogram and the watch points are shown with the screen shot. (Highlights 236, shadows 1) image
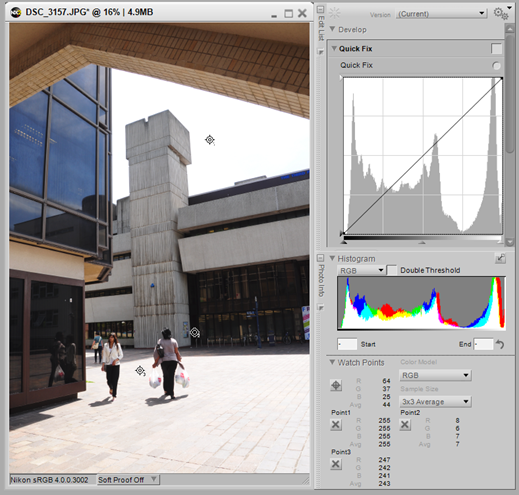
3157 1/100s f9 Having taken note of the exposure from the matrix setting I then switched to the spot setting to measure the exposure for the darkest part of the scene, f9. This effectively  burned out the sky but gave the correct exposure for the rest of the scene. image I’ve added a third watch point here on the paving between the figures, just to check the values. Point 1 (sky) is 255, point 2 (shadow) is 7 and point three (paving) is 243. Again this exposure is an acceptable compromise.
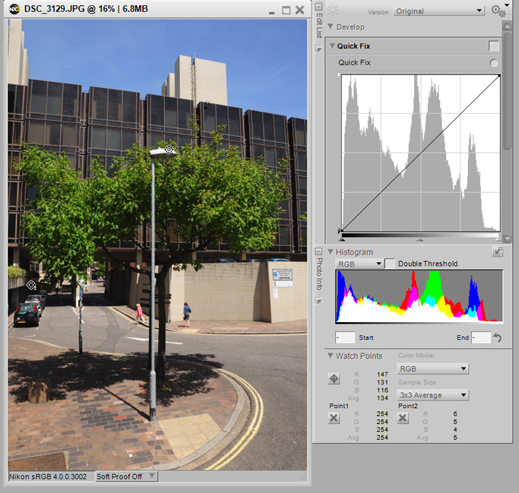
3129 1/125s f13 Because this scene was lit by the sun directly behind me, I judged that a matrix setting exposure reading would give a good image. Apart from a couple of pinpoints where the highlights and shadows are burnt/blocked, the scene is well exposed.
image

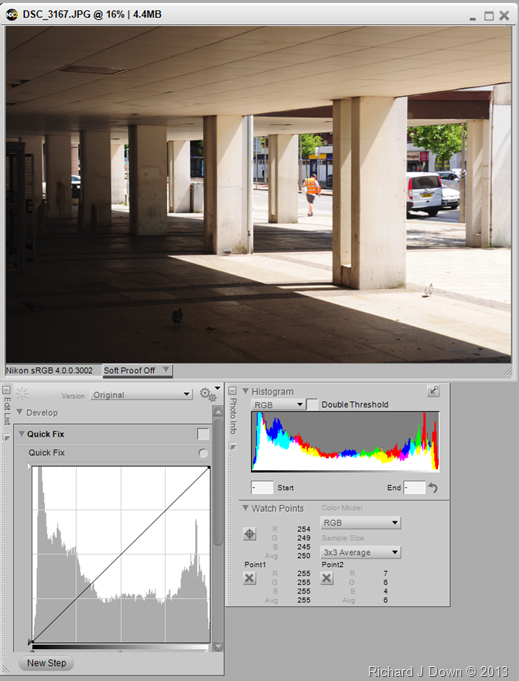
3167 1/125s f10 This scene was particularly challenging with deep shadows and bright highlights. I used the matrix setting again for this initial exposure.
image
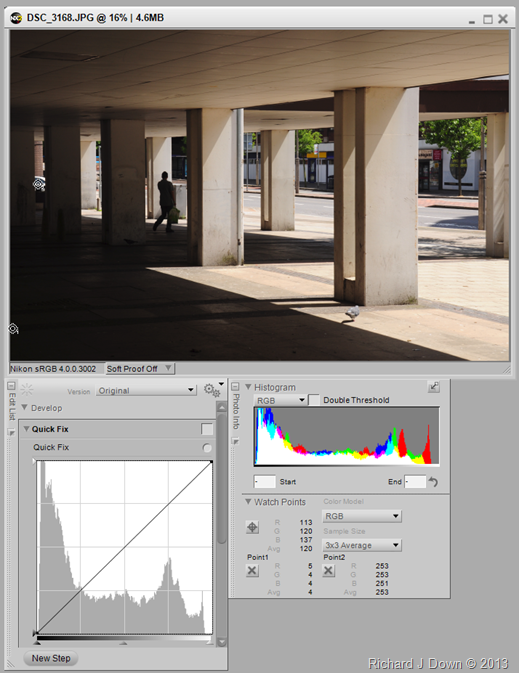
I checked the camera’s highlight clipping warning and re-set the aperture to f13:

3168 1/125s f13
image
This produced an acceptable image with some detail in the shadows and no clipped highlights.
For this category I will submit 3104, 3129 and 3168 as prints

Early morning or late evening landscapes with low angle incident light

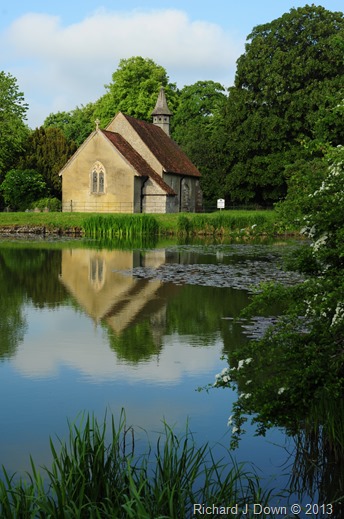
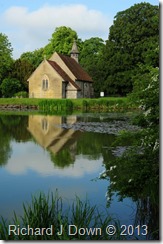
I chose to photograph the same location (Hartley Mauditt Church and pond) first in the evening and again in the early morning. I have experimented with using light from different directions and I have chosen the three most successful images. My methods of exposure assessment have already been described so I have not bothered to include as much detail on this occasion, just a brief summary. 3176 1/125s f10
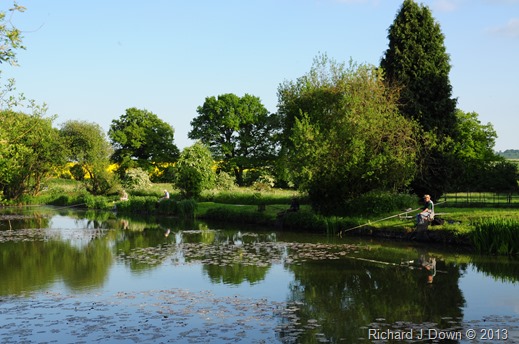

DSC_3176 For this image I kept the sun on my right shoulder so that the sky would not burn out. The histogram and the double threshold display show no clipping and one very small area of blocked shadow.

3179 1/125s f8
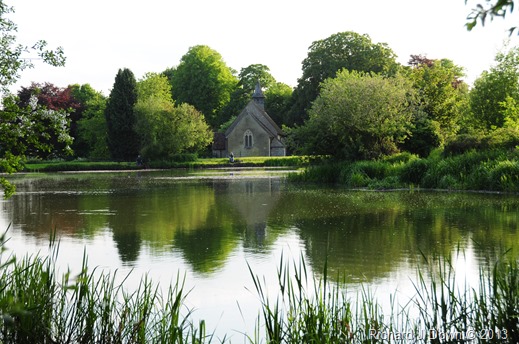

DSC_3179
The light here is from the right and  the sky has burned out completely as well as the reflection of the sky at bottom right. I did try giving less exposure but the church, which is in shadow, is lost amongst the trees although there was some detail in the sky.
DSC_3184

3209 1/125s f11

DSC_3209
In order to get the church in sunlight, I returned the following morning when the sun was coming from the opposite direction. Even then, it was so bright that I was fortunate to get this  exposure when cloud passed across the sun briefly. The double threshold display showed no clipped highlights or blocked shadows.


Indoor space with strong natural window light

I had difficulty choosing subjects for this section but I decided to go with everyday objects/activities in the hope that I would be able to produce something of interest. I started with the un-cleared breakfast able and worked my way around that as a theme. The exposures were made in manual mode using the highlight clipping tool for guidance and the double threshold and watch points (see above) to check for blocked shadows or blown highlights. I have used the smallest aperture and a tripod for maximum depth of field. 3735 2.5s f32 ISO 400

DSC_3735 This room has two windows opposite each other and gets even lighting. Despite strong sunlight to the left and north daylight to the right, there are no blocked shadows and only one small highlight in the pepper pot that is clipped.
I decided that my next image would be the same objects in a different setting. I tried a couple of compositions, with and without soap suds and came up with this arrangement. 3795 1/2.5s f32 ISO 800

DSC_3795 The sunlight here was from a window behind the objects – intense north daylight. The only highlights burnt out are some on the white china and the chrome rails. I had to frame carefully to avoid including the outside daylight in the frame which would have burned out at this exposure.
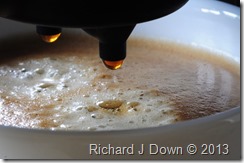
For the third image in the group, I wanted to include an introduction to the theme of morning routine with the preparation of coffee. I tried several points of view but the most interesting  was captured with a macro lens.The streams of liquid from the espresso head were too blurred because of the slow shutter speed so I waited until the final drops had formed before making the final shot. 3819 1/2.5s f25 ISO 800
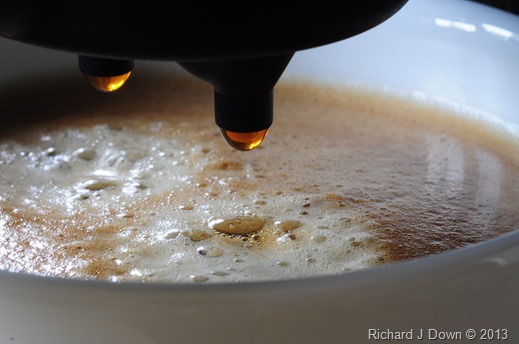
DSC_3819 Only the highlights on the froth are burned out. There are no blocked shadows.
Part 2
Street scene in the middle of a clear sunny day

My original plan was to re-shoot the three images for this situation on an over cast day. Having travelled to the location on two consecutive days with the weather forecast predicting cloud cover for the morning I found that the scenes I had originally photographed still in contrasty sunlight. Rather than travel back on a third day I decided to see what I could do in the way of recomposing the shots to reduce the contrast. 3104 1/125 f13 29mm

This was the original image. See above for details. DSC_3104
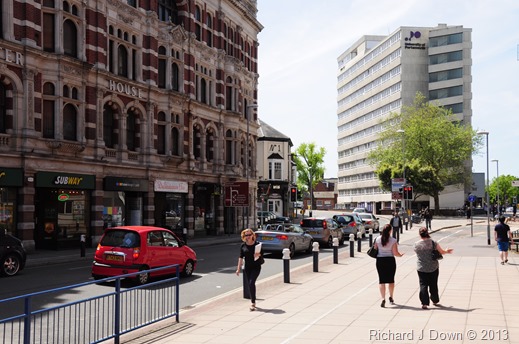
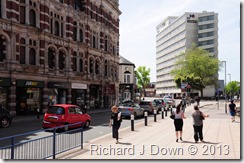
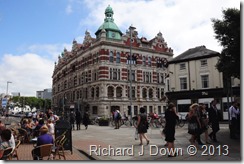
This area of Portsmouth was badly affected by bombing during WW2. Charter House (on the left, built 1889) is a listed building in the university area of  the city.   The image below was grabbed during a brief moment of lower intensity sunlight. 3912 1/100s f22 ISO 400
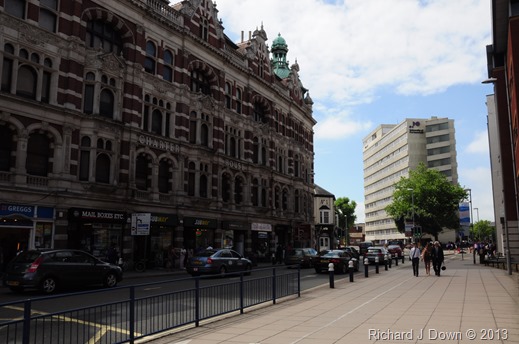
DSC_3912 The only real problem seems to be that whatever the lighting conditions, the sky will burn out if it has any amount of cloud and exposing for the sky, deepens the shadows. Blue sky doesn’t seem to burn out. The double threshold tool in my software showed no clipped highlights and lost shadows only around the wheels of the car on the left. With this in mind, I recomposed the image to exclude as much of the sky as possible and to include more of the listed building (Charter House) 3917 1/100s f18 ISO 400
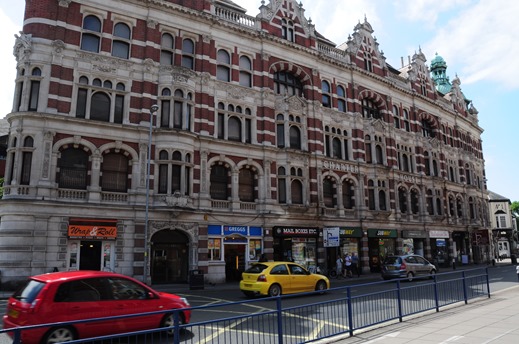
DSC_3917 This has lifted the shadows but the sky has clipped to the left and above the central gables. While I was waiting for more cloud to cover  the sky, I looked back at an image I took from the traffic island as I crossed the road.
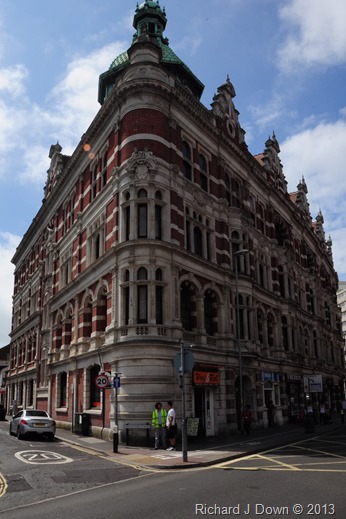
3910 1/160s f22 ISOP 400
DSC_3910
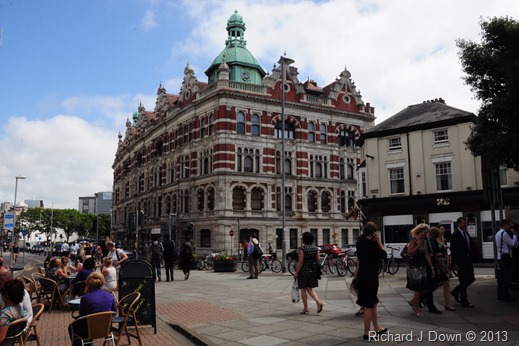
This image has no blocked shadows or clipped highlights. A third image from the other end of the building also has acceptable contrast with just a blocked shadow on the right which could be cropped out.
**3922 1/100s f22 ISO400
DSC_3922

This is the second image that I re-photographed.
3129 1/125s f13
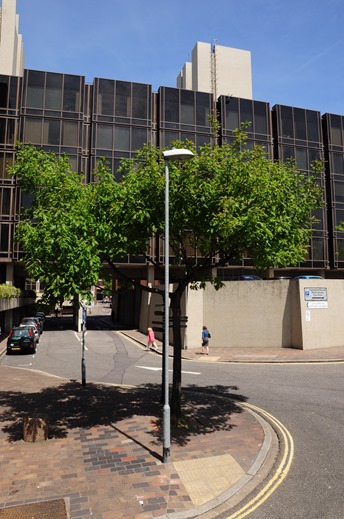
DSC_3129
This original image had only one clipped highlight, the top of the lamp post.
**3903 1/125s f11 ISO 400
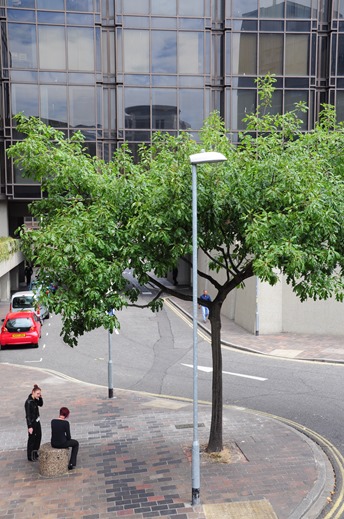
DSC_3903
The lower contrast image was much easier to accomplish as the sky was still cloudy. However, the light coloured cloud was likely to burn out so I recomposed  the image to exclude the sky.

The third image that I re-photographed was this one:
3168 1/125s f13
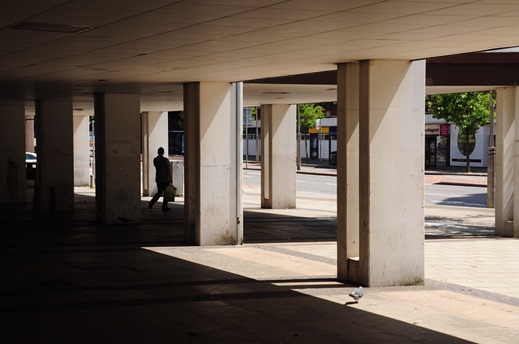
DSC_3168
This image had minimal clipped highlights and blocked shadows. (see above)
Again, this lower contrast image was easier to make with the cloud cover in place and no sky visible in the frame.
**3896 1/125s f11 ISO 400
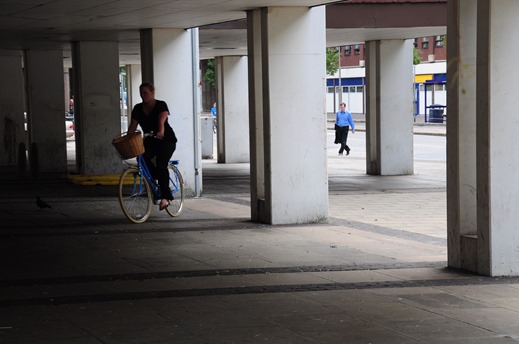
DSC_3896
The difference in white balance is due to the camera settings. As I was shooting in and out of the sunlight for the low contrast image I left the WB on Auto, whereas for the high contrast image I use daylight (sunlight).
**These are the images I will submit for Part 2 of the assignment